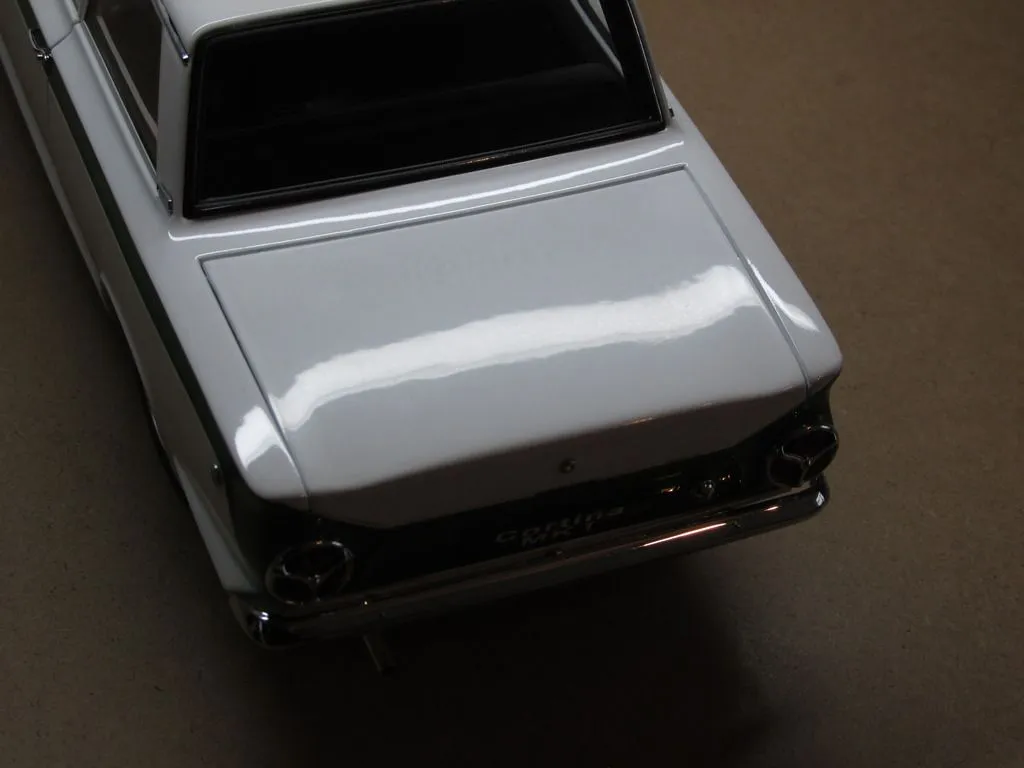
What is Paint Rash in Diecast Models
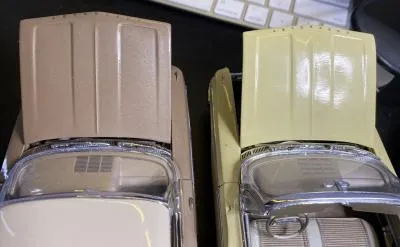
Paint rash is a distressing phenomenon that can plague diecast model collectors, resulting in the unsightly blistering, bubbling, or cracking of the paint finish. This unwelcome condition compromises the aesthetic appeal of these meticulously crafted miniatures, diminishing their value and charm. Understanding the intricacies of paint rash is crucial for collectors who aspire to protect their investments and preserve the beauty of their cherished diecast models. This guide delves into the causes, identification, and effective remedies for paint rash, empowering collectors to take proactive measures to safeguard their collections from this common ailment, ensuring that their models remain in pristine condition for years to come. It also provides some tips for storage and care.
Causes of Paint Rash on Diecast
Paint rash in diecast models is a multifaceted problem stemming from a combination of factors that interact over time. Several culprits contribute to this unwelcome deterioration of the paint surface, including chemical reactions, environmental conditions, and inherent manufacturing defects. The interplay of these elements determines the severity and progression of paint rash, making it essential for collectors to understand each factor to effectively address and prevent it. By recognizing the root causes, collectors can take proactive steps to mitigate the risks and safeguard the beauty of their diecast models, ensuring their lasting enjoyment and value.
Chemical Reactions

Chemical reactions are often at the heart of paint rash in diecast models. These reactions typically involve interactions between the paint, the underlying metal (usually zinc alloy), and other substances, such as moisture or contaminants. Over time, these interactions can lead to the degradation of the paint film, causing blistering, bubbling, or cracking. The specific chemicals involved can vary, but common culprits include acids, solvents, and even the plasticizers used in some model components. The composition of the paint itself also plays a role, with certain types of paint being more susceptible to these reactions. Understanding the chemical dynamics at play is crucial for collectors seeking to prevent and treat paint rash in their diecast models, such as rust.
Environmental Factors
Environmental factors play a significant role in the development of paint rash. Exposure to fluctuating temperatures, high humidity, and direct sunlight can accelerate the degradation of the paint on diecast models. Temperature variations cause the metal and paint to expand and contract at different rates, leading to stress and potential cracking. High humidity can promote moisture buildup, increasing the risk of chemical reactions and corrosion. Direct sunlight can fade the paint, making it more brittle and susceptible to damage. Protecting diecast models from these environmental stressors is crucial for preserving their appearance and value. This can be achieved through proper storage, which includes avoiding direct sunlight and extreme temperatures.
Manufacturing Defects
Manufacturing defects can also contribute to paint rash. Imperfections in the painting process, such as inadequate surface preparation, improper paint application, or the use of substandard materials, can create vulnerabilities in the paint finish. Air bubbles trapped beneath the paint can expand over time, leading to blistering. Contaminants on the model’s surface before painting can interfere with the paint’s adhesion, making it more prone to cracking or peeling. These defects may not be immediately apparent but can manifest as paint rash over time. Checking the condition of the model, before buying it, is essential. Careful examination of diecast models for any signs of manufacturing flaws during the initial purchase is a proactive step toward preventing paint rash.
How to Identify Paint Rash

Identifying paint rash early is crucial for effective intervention. Recognizing the telltale signs of paint degradation allows collectors to take prompt action, minimizing the damage and preventing further deterioration. Early detection can be achieved through careful visual and tactile examination of the diecast models. Regular inspection is essential to identify paint rash, as it is more likely to happen in older models. Being vigilant allows collectors to address issues before they become too severe. Early intervention significantly improves the chances of successful repair and preservation of these valuable collectibles, which ensures their quality and value.
Visual Inspection
A thorough visual inspection is the first line of defense in identifying paint rash. Examine the surface of your diecast models under good lighting conditions, looking for any irregularities in the paint finish. Early signs of paint rash include small blisters, bubbles, or cracks. Pay close attention to areas prone to damage, such as edges, corners, and areas with intricate details. Use a magnifying glass to examine the paint more closely, especially on older models. Note any changes in the paint’s color, texture, or gloss. Visual inspection is a non-invasive method that helps identify paint rash before it progresses to more severe stages. Regular visual checks are necessary to find and stop the damage from spreading.
Tactile Examination
Tactile examination complements visual inspection, providing additional clues about the condition of the paint. Gently run your fingertips over the surface of the model to feel for any irregularities. Paint rash often causes a rough or uneven texture. Feel for any raised areas, such as blisters or bubbles, or for areas where the paint feels detached from the metal. Use a soft cloth to gently wipe the surface, which can help reveal subtle changes in texture. Be cautious to avoid applying excessive pressure, which could further damage the paint. Tactile examination can reveal paint rash that might not be immediately apparent through visual inspection. Regular touching of your diecast models can help identify early signs of paint rash, which leads to quicker repairs.
Step 1 Assess the Severity

Before taking action, it’s essential to assess the severity of the paint rash. This evaluation will determine the appropriate course of action and the extent of the required repairs. Start by visually examining the affected areas, noting the size, number, and distribution of blisters, bubbles, or cracks. Assess the extent of paint loss, noting if the underlying metal is exposed. Consider the overall condition of the model and its historical significance. A model with minor paint rash may require a different approach than one with extensive damage. Properly assessing the severity allows you to choose the correct method of restoration. Documenting the existing conditions can also be helpful for future reference.
Step 2 Gentle Cleaning
Begin by gently cleaning the affected areas. Use a soft, clean cloth and a mild cleaning solution, such as diluted soapy water or a specialized model cleaner. Avoid using harsh chemicals or abrasive materials that could further damage the paint. Lightly dampen the cloth and gently wipe the affected areas, removing any dirt, dust, or loose debris. Avoid scrubbing the surface, as this can exacerbate the paint rash. Once the area is clean, allow it to dry completely before proceeding to the next step. Be patient. This step is crucial for ensuring that the surface is ready for further treatment. If the paint rash is severe, consult with a professional restorer. This can prevent further damage.
Step 3 Surface Treatment
Depending on the severity of the paint rash, the next step involves treating the affected surface. This may involve polishing compounds, waxing, or other specialized treatments. The goal is to smooth out minor imperfections, protect the underlying paint, and restore some of the original luster. Always test any treatment on a small, inconspicuous area first to ensure it does not cause further damage. Carefully follow the manufacturer’s instructions for the products you use. Patience and a gentle touch are crucial to avoid causing further damage. Properly treating the surface can improve the appearance of your models and preserve their original beauty. This step also improves the value of the models.
Using Polishing Compounds

Polishing compounds can be used to smooth out minor imperfections and remove light scratches or blemishes. Apply a small amount of the compound to a soft cloth and gently rub it onto the affected area in a circular motion. Use light pressure and avoid excessive rubbing, which could damage the paint. Continue until the surface appears smoother and the imperfections are less visible. Remove any excess compound with a clean cloth. There are different grades of polishing compounds, so choose one that is appropriate for the severity of the paint rash. Polishing compounds can help to restore the shine and luster of the paint. It is a great step to restore the quality of your models. This is the best choice for minor problems.
Applying Wax
Applying wax can protect the paint and provide a layer of defense against environmental factors. Choose a high-quality wax specifically designed for automotive or model car finishes. Apply a thin, even layer of wax to the entire surface of the model, following the manufacturer’s instructions. Allow the wax to dry, and then gently buff it to a shine with a clean cloth. Waxing creates a protective barrier that helps to prevent further damage and preserve the paint’s appearance. Regular waxing can extend the life of your diecast models and keep them looking their best. This helps protect the paint from moisture and sunlight. Make sure to use a high quality wax.
Step 4 Minor Repairs
For minor paint rash, such as small chips or scratches, consider using touch-up paint. Choose a touch-up paint that closely matches the original color of your model. Clean the area to be repaired and carefully apply the touch-up paint using a fine brush or applicator. Apply the paint in thin layers, allowing each layer to dry before applying the next. Once the paint has dried, you can gently sand the area with fine-grit sandpaper to smooth out any imperfections. Touch-up paint can help to restore the appearance of your model and prevent further damage. Remember to choose the correct color to ensure that the repairs blend in seamlessly. Touch-up paint is a cost-effective way to deal with minor damage.
Touch-Up Paint
Touch-up paint can be applied to a diecast model to fix minor damage. After cleaning the affected area, apply the touch-up paint using a fine brush. Several thin layers are best, allowing them to dry between applications. Matching the color of the original paint is essential for a seamless repair, so choose your paint carefully. Gently sand the repair area with fine-grit sandpaper to create a smooth finish. Touch-up paint is a cost-effective, do-it-yourself method. However, for more extensive damage, it is often best to call a professional. This is to preserve the value of the model.
Step 5 Preventive Measures
Taking preventive measures is critical to protecting your diecast models from paint rash. The best way to avoid paint rash is to store your models properly and regularly inspect them. Implementing preventive measures can help you protect your investment and keep your models in pristine condition for years to come. This includes proper storage, controlled environments, and regular maintenance. These steps will significantly reduce the risk of paint rash and ensure the longevity of your collection. This will add value to your model.
Proper Storage
Proper storage is the cornerstone of protecting your diecast models. Store your models in a cool, dry place away from direct sunlight and extreme temperatures. Sunlight can fade the paint, while extreme temperatures can cause the metal to expand and contract, leading to damage. Avoid storing your models in areas with high humidity, which can promote the formation of paint rash. Ideally, store your models in a display case or a dedicated storage box. Make sure your storage area is clean. Good storage practices will help protect the model and its value.
Controlled Environment

Maintaining a controlled environment for your diecast models is an important step. Keep the temperature and humidity levels stable. A climate-controlled room or storage area is the best option. Avoid significant temperature fluctuations, which can stress the paint. Try to keep the humidity level between 40% and 60%. Using a dehumidifier or a hygrometer can help you monitor and maintain the proper environment. A controlled environment will protect your models from the factors that contribute to paint rash. A stable environment will help preserve the value of your models.
Regular Maintenance
Regular maintenance is key to preventing and addressing paint rash. Inspect your models regularly for any signs of damage. Gently clean your models with a soft cloth to remove any dust or debris. Consider waxing your models periodically to provide a protective layer. Carefully handle your models to prevent accidental damage. Keep a record of any repairs or maintenance performed. Regular maintenance will keep your models in excellent condition and protect them from damage. All of these steps will protect the value of your models. Careful maintenance can add significant value to your collection.
Where to Find Additional Help
If you encounter severe paint rash or are unsure how to proceed with repairs, consider seeking professional help. There are experienced model restorers who specialize in repairing and restoring diecast models. Research and find a reputable restorer in your area. They can assess the damage, recommend the appropriate course of action, and perform the necessary repairs. They can handle more complex or extensive damage. You can also find assistance in online forums, model car clubs, and collectors’ communities. Seek professional help for more complex situations to protect your investment. This will ensure that the repairs are done correctly and that your models are preserved for the future. Professional restorers are usually better at solving problems.