What is a 1 64 Custom Diecast Big Sleeper
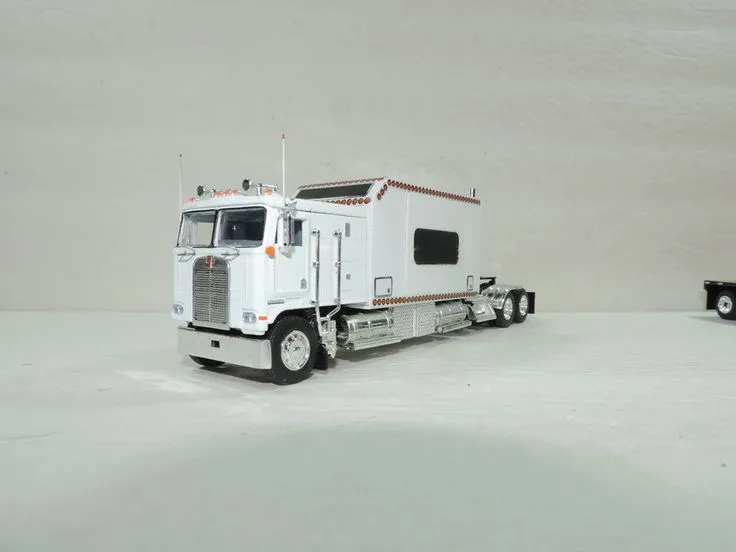
A 1 64 custom diecast big sleeper is a miniature replica of a semi-truck, specifically designed with a large sleeper cab, that has been modified and personalized by an individual. The ‘1 64’ refers to the scale, meaning the model is 1/64th the size of the real-life vehicle. These models are popular among hobbyists and collectors who enjoy the challenge of creating highly detailed and unique vehicles. Customization can range from simple paint jobs and decal applications to more complex modifications, such as adding custom wheels, detailing the interior, or even incorporating working lights. The big sleeper design is particularly appealing because it offers a larger canvas for customization and allows for intricate detailing, making it a favorite among enthusiasts. The customization process allows individuals to express their creativity and passion for trucks and model building.
Definition and Overview
The term ‘1 64 custom diecast big sleeper’ breaks down into several key components. ‘1 64’ is the scale, a common size for diecast model cars, allowing for a good level of detail while remaining relatively compact. ‘Custom’ indicates that the model has been altered from its original factory condition, reflecting the owner’s personal preferences and skills. ‘Diecast’ signifies the manufacturing process, where molten metal is poured into a mold, creating a durable and detailed model. Lastly, ‘big sleeper’ refers to the extended cab area, which is a signature feature of long-haul trucks, and it’s the part that gives ample space for detail and customization. The overall overview encompasses the entire process of taking a mass-produced model and transforming it into a one-of-a-kind piece of art, reflecting individual creativity and attention to detail. These models serve as both collectibles and expressions of artistic craftsmanship.
Why Customize a Big Sleeper

Customizing a 1 64 big sleeper diecast offers a unique and rewarding hobby for many reasons. First, it’s a creative outlet, allowing you to express your artistic vision and build skills in model building, painting, and detailing. It can be a relaxing and therapeutic activity, providing a break from the digital world and a chance to focus on a hands-on project. Furthermore, customization allows you to create something truly unique; no two custom models will be exactly alike, making each one a special piece. The larger surface area of the big sleeper provides plenty of room for intricate details and custom designs. Customization also allows you to replicate specific real-life trucks, pay homage to favorite vehicles, or even invent your own fictional designs. It’s a blend of artistry, technical skill, and personal expression.
Benefits of Customizing
The benefits of customizing a big sleeper extend beyond the mere creation of a model. Hobbyists often experience a sense of accomplishment and pride upon completing a custom project. The process enhances patience, attention to detail, and problem-solving skills. Customizing is a relatively inexpensive hobby compared to many others. It offers a community where enthusiasts can share their work, exchange tips, and participate in competitions. Custom models can be valuable collectibles, increasing in worth as they are further customized. Moreover, the skills gained in customization, such as painting and detailing, can be transferred to other model-making projects or even broader artistic endeavors. It is an engaging hobby that combines creativity, skill development, and social interaction.
Materials You’ll Need
To get started with customizing a 1 64 big sleeper diecast, you’ll need a range of materials. These can be broken down into several categories. First, you’ll need the base model, the diecast big sleeper itself, which can be purchased from various hobby stores or online retailers. Next, paints are crucial, and acrylic paints are a popular choice due to their ease of use, quick drying time, and versatility. You’ll also need primer to prepare the surface for painting, and clear coats for protection and shine. Decals and water slide paper are useful for adding detailed graphics, logos, or designs. Other materials include masking tape for precise paint lines, putty or filler for smoothing imperfections, and various types of glue for assembly. The specific materials will depend on the extent of your customization, but these form the foundation for most projects. The choices you make will reflect your desired aesthetic and the level of detail you wish to achieve.
Essential Tools for Customization

The right tools are critical for successful custom diecast projects. A basic tool kit should include precision screwdrivers, essential for disassembling and reassembling the model. Hobby knives or X-Acto knives are indispensable for trimming, detailing, and removing unwanted parts. Fine-tipped paintbrushes are necessary for detailed painting and applying small decals. You will also need a cutting mat to protect your work surface and provide a stable base. Small files and sanding sticks are used to smooth surfaces and prepare them for painting. Tweezers are helpful for handling small parts and decals. A miniature airbrush and compressor can be used for painting, providing a professional finish. Finally, magnification tools, such as a magnifying lamp or a jeweler’s loupe, can significantly aid in detailed work. Investing in quality tools will make the customizing process easier and more enjoyable, while also improving the quality of your final product.
Step-by-Step Customization Guide
Customizing a 1 64 big sleeper involves several key steps, each contributing to the final product. The first step is disassembly and preparation. This involves carefully taking apart the model, which often requires removing screws and pins, followed by cleaning and degreasing the parts to ensure paint adhesion. Next, painting is a crucial step, involving the application of primer, base coats, and clear coats, with careful attention to detail and color matching. The third step includes the use of decals and detailed applications of graphics. Once the paint and decals are dry, the model is reassembled, ensuring all parts fit correctly. It’s crucial to keep a clean workspace, work in a well-ventilated area, and take your time to ensure each step is done properly. This step-by-step approach will lead to a more polished and professional-looking finish.
Disassembly and Prep
Disassembly and preparation is the foundational step in customizing a big sleeper. Begin by gathering the necessary tools, usually including precision screwdrivers and possibly a hobby knife. Carefully remove all screws, clips, and other fasteners that hold the model together. Take photos or make notes to help remember where each part goes during reassembly. Once disassembled, clean each part thoroughly to remove any dirt, oils, or factory coatings. This can be done with warm water, dish soap, and a soft brush. After cleaning, it is essential to sand any imperfections and prepare the surfaces for priming. Applying a primer is critical, as it creates a surface that paint will adhere to, and improves durability. Proper preparation sets the stage for a successful paint job and a high-quality final product. This step is time-consuming but is one of the most important for great results.
Painting Techniques

Painting your custom big sleeper is where you start to bring your vision to life. Start by choosing the right paints. Acrylic paints are ideal for model work due to their low odor, quick drying time, and ease of use. Apply a thin, even layer of primer to all parts to create a good surface for the paint. Base coats should be applied in multiple thin layers to prevent drips and ensure even coverage. You can use a brush for smaller areas or an airbrush for a smoother, more professional finish. When using an airbrush, practice on scrap material before applying to the model. After the base coat is completely dry, you can apply any detailed paintwork, such as stripes, logos, or weathering effects. Finally, finish with a clear coat to protect the paint and add shine. Patience and multiple thin layers will ensure a high-quality finish.
Detailed Painting Methods
Detailed painting methods take the customization to the next level. Fine details require a steady hand and the right tools. Using small, fine-tipped paintbrushes, carefully paint details such as headlights, taillights, and any other trim or accent elements. Masking tape can be used to create clean lines and separate colors. For intricate details like pinstripes or lettering, consider using fine-tipped paint pens or even decals. Weathering techniques, such as dry brushing or washes, can add realism and depth to the model. Dry brushing involves dipping a brush in paint, wiping off most of it, and then lightly brushing it over the surface to highlight raised details. Washes, which involve applying a thin, diluted paint to the model, can enhance recessed areas and create shadows. Experimenting with different techniques will allow you to create a truly unique and realistic custom big sleeper.
Decaling and Detailing
Decaling and detailing add personality to your custom big sleeper. Decals offer a simple way to add logos, graphics, and other designs to your model. Before applying decals, make sure the surface is clean and smooth. Carefully cut out the decals, dip them in water, and slide them onto the model. Use a soft cloth or cotton swab to remove any air bubbles and ensure the decals are firmly in place. You can use decal setting solutions to help the decals conform to the surface and improve adhesion. Detailing includes adding small details, such as mirrors, lights, and other accessories. You can purchase aftermarket detail parts or create your own using various materials. This stage is where the model truly becomes your own creation, incorporating your unique vision and attention to detail.
Reassembly and Finishing Touches

Reassembly is the final step in bringing your custom big sleeper back together. Carefully reassemble the model, referring to the photos and notes you took during disassembly. Ensure all parts fit correctly and are securely fastened. Be especially careful with delicate parts that could be damaged. Once reassembled, inspect the model for any imperfections and make any necessary touch-ups. Apply a final clear coat to protect the paint and decals. Consider adding any final details, such as custom wheels or accessories. This is where you bring all of your hard work together, so take your time and enjoy the process. The finishing touches will make your custom big sleeper a display-worthy piece of art.
Common Mistakes and How to Avoid Them
Avoiding common mistakes will help ensure your customizing project is successful. One frequent error is rushing the process, leading to poor paint quality or improperly applied decals. Take your time with each step and allow adequate drying time. Another common mistake is skipping surface preparation, which can result in paint peeling or uneven finishes. Always clean and prime the model thoroughly before painting. Using too much paint can lead to runs, drips, and a loss of detail. Apply paint in thin, even layers. Failing to protect decals can lead to damage or fading. Protect decals with a clear coat. Lack of proper planning will create problems as you go. Consider creating a design plan before you start to ensure the finished product is as expected. By being aware of these common pitfalls and taking the time to do the job correctly, you will significantly improve your chances of a great custom diecast model.
Troubleshooting Tips
Troubleshooting is part of any customizing project. If you encounter problems, remain patient and find solutions. If paint runs or drips occur, try sanding them down and re-painting with thinner coats. If decals bubble, use a pin to prick the bubbles and then apply a decal setting solution. If parts don’t fit together, carefully examine them for any paint buildup or obstructions. If paint is not adhering to the surface, ensure the surface is clean and primed properly. Many online resources, such as forums, and video tutorials, are available to help. Don’t be afraid to ask for help or experiment with different techniques. Remember that every modeler makes mistakes, and learning from them is part of the process.
Where to Find Supplies

Finding the right supplies is critical to your customization journey. A wide variety of online and local stores can supply the materials you will need. Hobby shops are a great resource, offering everything from diecast models to paints, tools, and decals. Art supply stores carry many paints and brushes suitable for model building. Hardware stores are a good place to source tools, sandpaper, and other necessary items. Additionally, online retailers offer an extensive selection of products, often at competitive prices. Searching for model-specific supplies online allows you to explore a wide array of specialized materials and tools that are difficult to find locally. Build relationships with other modelers in your area. Check online forums and social media groups for recommendations.
Online Retailers and Suppliers
Several online retailers and suppliers specialize in diecast models and customization supplies. These offer convenience, selection, and often competitive pricing. Websites like eBay and Amazon provide a marketplace for both new and used models, as well as supplies from various sellers. Specialty online hobby stores are dedicated to model building and offer a curated selection of high-quality products. These stores frequently have detailed product descriptions, tutorials, and helpful customer support. Search for shops offering model-specific parts. Many of these will allow you to access a large selection of models, paints, tools, decals, and accessories, saving time and expanding your options. Always research the supplier’s reputation and read reviews before making a purchase. Utilizing these online resources will make acquiring the necessary supplies for your projects easy and convenient.
Showcasing Your Custom Big Sleeper
Once your custom big sleeper is complete, showcasing it is a great way to appreciate your work and share it with others. Consider displaying your model in a dedicated space, such as a display case or shelf. Proper lighting can enhance the details and colors of the model. Participate in online model car communities and forums. Share photos of your project with other enthusiasts. Another great way to showcase your creation is to enter your model in local model contests or shows. This provides a chance to get feedback from other modelers and potentially win awards. By participating in these forums and showing off your work, you can connect with a broader community, garner recognition, and gain inspiration for future projects.
Display and Photography Tips

The way you display and photograph your model can greatly impact how it is perceived. Displaying your custom big sleeper in a clean, well-lit environment is essential. A display case protects your model from dust and damage while highlighting its details. Pay attention to the background, choosing a setting that complements the model without distracting from it. When photographing your model, use good lighting, and consider using a tripod for sharper images. Experiment with different angles and perspectives to showcase the details. Use a shallow depth of field to blur the background and draw focus to the model. Photo editing software can be used to enhance colors, adjust contrast, and remove imperfections. By carefully considering these display and photography tips, you can capture and share your custom big sleeper in a way that truly highlights your craftsmanship.